Retro games like Game Boy Advance have a nostalgic and classic value that cannot fade away with time. Though the setups to play the games have advanced, yet some of these still carry value for hardcore gamers even today.
That is why with the advancement of technologies and platforms they still sometimes want to play these old games. So in this article, we will give you step by step guide to setting up and installing these classic Retro games in Kodi.
This includes setting up the controller with the platform, finding Retro games, installing emulators, and much more. With the release of the 18 Leia version, this software now has the necessary support to play classic games through the RetroPlayer framework. Now this means you can synchronize the controller to Kodi, install the emulators and load your favorite ROMs.
Now with version 19, the latest Bluetooth controllers are also compatible with it. The ROMs or game systems that can be emulated now include Nintendo, Super Nintendo, Nintendo DS; Gameboy, Gameboy Advance (GBA), Gameboy Color; Sega Saturn; DOS; and PlayStation One.
Synchronizing and Configuring Game Controllers
Now we will see how to get your regulator set up in Kodi. This is to help you set up and configure your game set for retro games on the platform. This covers some important questions that anyone looking to synchronize and configure the games controllers may ask.
The platform supports a number of controllers. These include Xbox, Nvidia Shield, Generic Game Controllers, and Sony PlayStation to name a few.
How to Pair Controllers
So to start the working of the game controller on the platform, you have to first set up the sync of the hardware your Kodi is installed onto. This could be an Android TV box, a Mac, Linux, or Windows.
If it is the wired one, plug it into the device. If it is Bluetooth-controlled, just switch it on and make sure it is not connected to a third device.
Pairing Game Controller on Amazon Fire
If the device, that you want to pair with is Amazon Fire. Here the steps will be a bit different.
First Go to Settings > Controllers & Bluetooth Devices.
In the next step, select the game controllers and click on ‘Add New Game Controller’.
Amazon Fire will start searching for the named device using Bluetooth.
If the Controller is PlayStation 4, just push and hold down the center PS button and the ‘Share’ button simultaneously.
For other game controllers, just turn on the set and press the ‘Sync’ button on it.
When the Amazon Fire finds the set, it will add the name to the list on the screen that you can see. Now you can use it freely to navigate the given menu.
Pair Game Controller on Android TV
For the Android TV box, the steps are a tad different. But don’t worry it will be easy sailing for you with this step-by-step guide.
First, pair your set by going to Setting (for this you can use gear icon) > Devices & Accessories > Add Accessory.
You will be asked to turn Bluetooth On on your Android TV box, press the button to allow it. Once you give the permission, it will start searching for the control set.
For PlayStation 4 controllers, hold down the middle PS button and ‘Share’ button simultaneously, for other brands and types, just turn on the controller and press the Synchronization button on the set.
When the Android TV box finds the set, it will be shown on the screen as the added one. After this step, just scroll down and press OK. Now you can use the controller to navigate the menu on display.
How to make Kodi add your Game Controller
Usually, you should be able to use your controller and launch the platform by navigating the menu as you normally do.
If Kodi is not recognizing your set by default, it is most probably due to the ‘disabled’ status in Kodi’s settings. In this case, here is how you can fix the issue.
From the main menu, press on the settings (from the gear icon)
Go to ‘System’ and find the ‘Input tab’.
On the right side, tap on ‘Configure attached controllers’.
The software will prompt you to enable the add-on configuration. Go for ‘Yes.’
A window will pop up and show you the installed gamepad in addition to any other profile that you have set up. Here just click ‘OK’ to save and exit the window.
Check it. Now the system is working and you can play Retro games on Kodi without any delay after installing them.
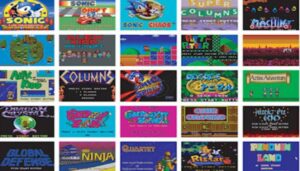
Install Controller Addons
This step is a must to properly use any given emulator. Here you will have to install a specific addon for that controller. For this, the steps are as follows.
Go to the main menu, click on the Add-ons icon.
Select the option of install from the repository.
Here, click on Kodi Add-on Repository.
Tap the Game Add-ons.
Now select Controller Profiles.
From the screen now, install the controller profiles for all the emulators i.e. Nintendo, PlayStation, etc. that you wish to use.
Final Words
Here we described in detail, how to set up game controllers for retro games in Kodi. Now you can enjoy your favorite classics across platforms using these guides. The next step is the Roms Download and you are good to go. It is time to indulge in the past and recreate some scenes with your friends.







Comments